
Container Gardens
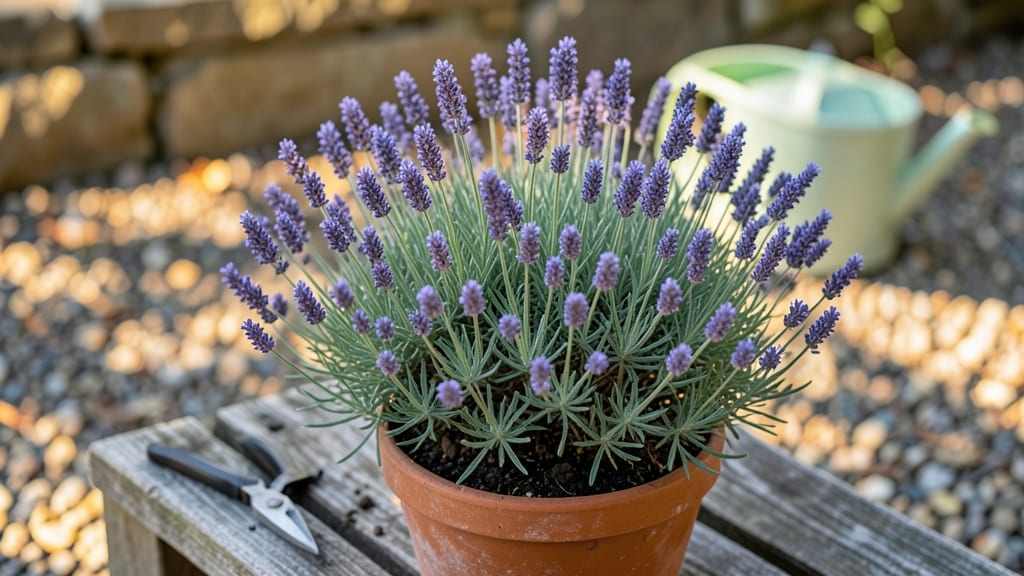
Growing potted lavender is all about mastering three key elements: sunlight, drainage, and watering restraint—and I’ll show you exactly how to get them right. 🌿 That first year, my lavender nearly died from overwatering, but now it’s a fragrant purple showstopper that blooms from June through September.
The right pot makes all the difference—terracotta or ceramic with drainage holes, at least 12 inches deep and wide enough for roots to spread. Fill it with fast-draining soil mix (equal parts potting soil, perlite, and coarse sand), and plant your lavender 3-4 inches apart to prevent overcrowding.
Once established, your lavender will reward you with woody stems, silvery foliage, and clusters of purple blooms that attract bees. The scent alone makes it worth the effort, but the drought tolerance means you’ll spend less time fussing and more time enjoying.
For winter care, move pots to a sheltered spot or wrap them in burlap to protect from freezing temperatures. Prune lightly in early spring to encourage bushier growth—just snip back one-third of the previous year’s growth.
📚 In This Guide
- What you need
- Instructions
- Tips and common mistakes
- Wrapping up and next steps
What you need
- ● Lavender plants: 1–3 nursery-grown plants (choose English, French, or Spanish varieties for potted growth). Opt for 1-gallon containers for mature plants or 6-inch pots for starters.
- ● Containers: 1–2 pots per plant with drainage holes (terracotta, ceramic, or plastic). Size: 12–18 inches deep and 12–16 inches wide for mature lavender.
- ● Well-draining potting mix: 1–2 bags of a cactus/succulent mix (or blend with perlite/pumice for extra grit). Avoid garden soil—lavender hates soggy roots!
- ● Gravel or pebbles: A handful for the pot’s bottom layer (1–2 inches) to boost drainage.
- ○ Gloves (optional but handy for handling prickly stems).
- ● Trowel or small shovel for planting and repotting.
- ● Pruning shears (sharp, clean pair for trimming spent blooms or shaping).
- ● Watering can with a narrow spout (or a spray bottle for gentle hydration).
- ○ Mulch (optional): A light layer of gravel or coarse sand to retain heat and deter weeds.
- ○ Slow-release fertilizer (optional): 1–2 tablets of osmocote or a balanced 10-10-10 granular fertilizer for a seasonal boost.
- ● A sunny spot with at least 6–8 hours of direct sunlight daily (lavender is a sun-worshipper!).
- ● Access to well-draining soil if you plan to transplant later (though potted lavender thrives without it!).
- ● Patience! Lavender grows slowly but rewards you with years of fragrance and beauty.
Step-by-Step guide to growing thriving potted lavender
Lavender thrives when you give it the right conditions—here's how to create a perfect home for it in containers.
🪴 Step 1: Select the Right Pot and Drainage
Lavender roots despise soggy soil, so choose a pot with multiple drainage holes and at least 12 inches deep for each plant. I prefer terracotta because it breathes and helps regulate moisture—plastic traps too much humidity. If your pot lacks drainage, drill holes yourself or place it on a crock filled with pebbles to elevate the plant.
For the 4 plants you're growing, use one 12-inch pot per plant or a large container with 12-inch spacing between each. The key is avoiding competition for water and nutrients. Fill the bottom 2 inches with gravel or coarse sand to improve drainage further. This prevents root rot, which is lavender's biggest enemy.
🌱 Step 2: Prepare Well-Draining Soil Mix
Lavender refuses to grow in regular potting soil—it needs a fast-draining, sandy mix to mimic its Mediterranean roots. Combine equal parts potting soil, coarse sand, and perlite (or use a cactus/succulent mix as a shortcut). This creates air pockets that prevent waterlogging.
Fill each pot ¾ full with your mix, leaving room for the plant. Tap the pot gently to settle the soil, then create a small mound in the center. This ensures roots spread outward rather than sitting in a hole. Moisten the soil lightly before planting—just enough to dampen it without soaking.
☀️ Step 3: Plant and Position for Full Sun
Dig a hole twice as wide as the root ball but only as deep as the plant's container. Gently remove the lavender from its nursery pot and loosen any circling roots with your fingers. Place it in the hole so the top of the root ball sits just below the soil line—never bury the stem.
Lavender demands full sun (6+ hours daily)—a south or west-facing spot is ideal. If you only have partial sun, expect fewer flowers and leggy growth. After planting, water deeply but only until water runs out the drainage holes. Let the pot dry completely before watering again—lavender hates wet feet.
💧 Step 4: Establish a Watering Routine
Newly planted lavender needs water every 3-4 days until established, but mature plants thrive on neglect. Check soil moisture by sticking your finger 1 inch deep—water only when it feels completely dry. Overwatering causes root rot, while underwatering makes leaves crispy. I aim for dry soil between waterings once the plant matures.
In summer, lavender may need weekly watering, but reduce to every 2-3 weeks in winter. A drip irrigation system or self-watering pot helps maintain consistency without drowning the roots. Fertilizer? Skip it—lavender prefers lean soil. A light application of compost in spring is enough to encourage blooms.
✂️ Step 5: Prune for Bushier Growth and More Flowers
Wait until spring to prune—never cut into old wood. Trim back 1/3 of the plant's height right after flowering to encourage new growth. Use clean, sharp shears and cut just above a set of leaves. This prevents woody stems and keeps the plant compact.
Deadhead spent blooms in late summer to prevent seed formation and redirect energy to next year's flowers. If your lavender gets leggy, prune again in early spring before new growth starts. Avoid heavy pruning in fall—it stresses the plant before winter dormancy.
Tips & tricks for perfect potted lavender
Took me years to perfect these little tricks—here's how to avoid the common pitfalls that kill lavender plants.
Drainage is Non-Negotiable: I learned this the hard way after losing three lavender plants to root rot. That 2-inch gravel layer in Step 1 isn't optional—it's your insurance policy. For extra protection, elevate pots on feet or use cache pots with built-in drainage. If you're using decorative outer pots, make sure the inner pot has drainage holes and isn't sealed airtight.
Soil Science Matters: The equal parts potting soil, coarse sand, and perlite mix creates the perfect Mediterranean environment lavender craves. Pro tip: If you're short on perlite, substitute with pumice or horticultural charcoal—both improve drainage and prevent compaction. For the mound technique in Step 2, imagine you're creating a little hill for the roots to climb rather than a hole to sink into.
Sunlight Strategy: That 6+ hours of full sun requirement is non-negotiable, but here's what nobody tells you: lavender handles heat better than shade. If you're in a hot climate, morning sun with afternoon shade works better than partial shade all day. For balcony growers, rotate pots weekly so all sides get even sun exposure—this prevents lopsided growth and maximizes blooms.
Watering Wisdom: The finger test in Step 4 is your best friend, but here's the secret: lavender's roots are surprisingly deep. Check moisture at 2 inches deep (not just 1 inch) for a more accurate reading. In summer, I water mine in the morning so leaves have all day to dry—wet foliage at night invites fungal diseases. For established plants, let the soil get bone dry between waterings; you'll know it's ready when the pot feels light.
Pro Tips for Growing Potted Lavender
- Took me years to perfect these little tricks—here's how to avoid the common pitfalls that kill lavender plants.
- Drainage is Non-Negotiable: I learned this the hard way after losing three lavender plants to root rot. That 2-inch g...
- Soil Science Matters: The equal parts potting soil, coarse sand, and perlite mix creates the perfect Mediterranean en...
Frequently asked questions
Got questions about keeping your potted lavender thriving?
Here are answers to the most common ones—from pruning to pests and everything in between.
How often should I water my potted lavender?
Lavender hates soggy roots, so water only when the top 1–2 inches of soil feel dry. Aim for once a week in summer (or less if it’s humid) and reduce to every 2–3 weeks in winter. Overwatering is the #1 killer—drainage holes are a must!
When and how should I prune my potted lavender?
Prune right after flowering (late spring/early summer) to shape the plant and encourage bushiness. Use clean, sharp shears to trim 1/3 of the new growth, avoiding woody stems. Skip pruning in the first year—let it establish first!
What pests or diseases should I watch for in potted lavender?
Lavender is tough, but keep an eye out for aphids, spider mites, or whiteflies (wipe leaves with soapy water if spotted). Root rot from overwatering is another risk—ensure pots have drainage and avoid saucers trapping moisture.
Can I grow lavender in a shaded spot?
Lavender craves full sun (6+ hours daily) and struggles in shade. If your space is shady, choose a smaller pot and place it in the sunniest spot possible. Partial shade (3–4 hours of sun) may work in cooler climates, but expect less blooming.
How do I overwinter potted lavender?
Move pots to a protected, sheltered spot (like a garage or under eaves) before frost. Reduce watering and mulch lightly with straw. In freezing climates, wrap pots in burlap or use frost cloth. Resume normal care in spring!
Wrapping up and next steps
Growing potted lavender is a rewarding journey that brings fragrant beauty to your space with minimal effort! 🌿 With the right soil, sunlight, and care, your purple spikes will thrive and fill your garden—or even your windowsill—with a soothing aroma all summer long. Now that you’re armed with tips and tricks, why not take the next step?
- Plant your first pot this weekend and enjoy the process!
- Experiment with different varieties or even companion plants to see what thrives best in your climate.
Happy gardening—your future lavender will thank you! 🌸