
Container Gardens
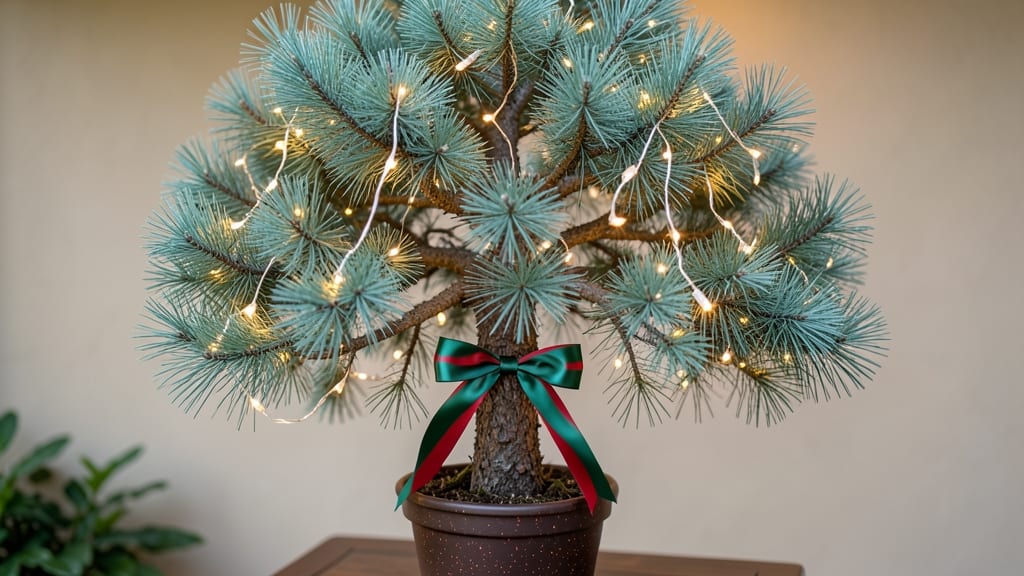
Skip the sad, dropped-needle fate—your live potted Xmas trees can stay vibrant all year with the right care, gracing both your home and garden with festive cheer. 🌲 beyond December.
I’ve grown them for five winters now, and the secret isn’t complicated: it’s about matching their needs to each season’s demands.
The right tree makes all the difference—a Norfolk Island pine or Fraser fir holds its needles better indoors than a cut tree ever could. You’ll need a 15-20 gallon pot with drainage, a well-draining potting mix, and a spot with bright, indirect light (no harsh winter sun).
Watering’s the trickiest part: let the top inch dry out before watering again, but don’t let it get bone-dry—needles turn brown when roots struggle.
By spring, your tree will reward you with new growth and maybe even tiny cones. Prune lightly in early spring to shape it, and fertilize once a month with a balanced formula. The best part?
You’ll never again feel guilty about tossing a real tree after Christmas—this one’s a living heirloom. Just watch for pests like spider mites (spray with neem oil if you see webbing) and root-bound issues (repot every 2-3 years).
Outdoor winters? Move it to a sheltered spot and mulch the pot to protect roots. Indoor winters? Keep humidity high with a pebble tray or misting. The key is adapting—these trees can handle both worlds if you give them what they need when they need it.
Ready to make yours last for decades?
📚 In This Guide
- What you need
- Instructions
- Tips and common mistakes
- Wrapping up and next steps
What you need
- ● Potted Christmas tree: Choose a dwarf Alberta spruce, Norfolk Island pine, or Fraser fir (3–6 ft tall, depending on space). Ensure it’s pre-potted with a sturdy container (5–15 gallon size).
- ● Well-draining potting mix: 1 bag of peat-free, acidic mix (e.g., 50% pine bark, 30% perlite, 20% compost). Avoid garden soil—it compacts!
- ● Container (if repotting): A durable, breathable pot (plastic, ceramic, or fabric) with drainage holes. Size up 1–2 inches from the root ball.
- ● Slow-release fertilizer: 1–2 cups of balanced, organic fertilizer (e.g., 10-10-10 or fish emulsion) for planting.
- ○ Mulch (optional but helpful): Pine bark or wood chips to retain moisture and mimic forest floor conditions.
- ● Watering can or hose with nozzle: For gentle, deep hydration (avoid overhead spraying).
- ● Pruning shears: Sterilized, sharp shears (for shaping or trimming brown tips).
- ● Light source: A grow light or sunny window (6+ hours of indirect light daily).
- ● Tree stand or decorative base: Elevates roots for airflow and adds holiday flair.
- ● Humidifier or pebble tray: Boosts humidity in dry indoor air (critical for Norfolk Island pines).
- ● Tree-specific fertilizer: Acid-loving plant food (e.g., azalea/camellia blend) every 4–6 weeks.
- ● Ornament-friendly branches: If decorating, opt for flexible, non-needle-dropping varieties like Amabilis fir.
- ● Tree health monitor: A moisture meter to track soil hydration (overwatering is a silent killer!).
How to grow and care for live potted Christmas trees
Skip the yearly fuss of cutting trees—grow your own holiday greens that come back every season.
🌱 Step 1: Select the Right Tree Species for Potted Growing
Not all Christmas trees thrive in pots. Choose dwarf varieties like Norway spruce (Picea abies 'Little Gem'), Scotch pine (Pinus sylvestris 'Beuvron'), or Eastern white pine (Pinus strobus 'Nana')—these stay compact and adapt well. Avoid full-sized species; their root systems outgrow containers quickly.
Buy a 3-5 gallon potted tree from a nursery in early fall. Look for a well-rooted specimen with firm, dark green needles—yellowing or sparse foliage means stress. The container should have drainage holes, but if it doesn’t, plan to repot immediately. I always check for white, fibrous roots at the drainage holes; thick, woody roots signal the tree’s been pot-bound too long.
🪴 Step 2: Repot with Proper Soil and Container Setup
Upgrade to a 5-7 gallon container (one size larger than the nursery pot) with drainage holes. Use a well-draining potting mix—never garden soil. I blend 50% peat moss, 30% perlite, and 20% compost for aeration and moisture control. Fill the new pot 1/3 full with mix, then gently remove the tree from its nursery container.
Loosen the root ball with your fingers (don’t tear roots) and place the tree in the center of the new pot. Fill gaps with more mix, pressing lightly to eliminate air pockets but not compacting. Leave 1 inch of space between the soil surface and pot rim for watering. Water thoroughly until it drains from the bottom—this settles the soil and removes air bubbles around roots.
☀️ Step 3: Position for Light and Temperature Needs
Live potted Christmas trees need full sun (6+ hours daily) but tolerate partial shade. Place them in a protected outdoor spot (patio, balcony, or yard) during growing seasons. In winter, move them to an unheated garage, porch, or covered area where temperatures stay above 20°F. Avoid indoor heat sources like fireplaces or vents—dry air and heat stress the tree.
Rotate the pot a quarter turn weekly to prevent the tree from leaning toward light. You’ll notice uneven growth if you skip this—one side stretches toward the sun while the other stays sparse. Water when the top 1-2 inches of soil feel dry, but never let the tree sit in soggy soil. Overwatering in winter is the #1 killer of potted holiday trees.
✂️ Step 4: Prune and Fertilize for Year-Round Health
Prune late winter or early spring (just as new growth starts) to shape the tree and encourage bushiness. Use clean, sharp pruners to trim 1/3 of the oldest growth—look for woody, brown branches at the base. Make cuts just above a healthy bud or branch junction. Avoid cutting into fresh green growth; you’ll stunt new needles.
Fertilize twice a year: once in early spring with a balanced 10-10-10 fertilizer and again in mid-summer with a slow-release evergreen fertilizer. Follow package rates—over-fertilizing burns roots. I always water the tree 24 hours before fertilizing so nutrients soak in evenly. Yellow needles after fertilizing? You’ve overdone it—flush the soil with water immediately.
🎄 Step 5: Prepare for Holiday Display and Post-Season Care
Start 8-10 weeks before Christmas to harden the tree for indoor display. Move it to a shaded outdoor spot for 2-3 hours daily, gradually increasing time. By the week of Christmas, it should tolerate indoor conditions for 2-3 weeks without stress. Place it away from heat sources, fireplaces, or direct sunlight—needles dry out and drop within days.
After the holidays, return the tree to its protected outdoor spot. Reduce watering in late fall/winter—the tree’s growth slows, and overwatering causes root rot. In early spring, resume regular watering and fertilizing. With proper care, your potted Christmas tree will grow 6-12 inches yearly and provide holiday cheer for decades.
Tips & tricks for perfect live potted Christmas trees
Here's what nobody tells you about keeping your potted holiday trees thriving year after year.
Selection Tip: When buying your 3-5 gallon tree in early fall, inspect the root system closely. Look for white, fibrous roots at the drainage holes—these indicate a healthy, adaptable specimen. If you see thick, woody roots, the tree has been pot-bound too long and may struggle to grow properly. I've learned this the hard way after watching a previously purchased tree decline within months.
Soil Mix Secret: The 50-30-20 blend of peat moss, perlite, and compost is non-negotiable for proper aeration. If you can't find these exact ingredients, substitute coco coir for peat moss and vermiculite for perlite. The key is maintaining that air-to-moisture balance—conventional garden soil compacts and suffocates roots, leading to rot. After repotting, I always press the soil lightly to eliminate air pockets while keeping it loose enough for roots to spread.
Winter Survival Strategy: That 20°F minimum temperature is crucial for winter survival. If your garage or porch drops below this, consider moving the tree to an unheated basement with good air circulation. I've had trees survive down to 15°F for short periods, but prolonged exposure below 20°F causes needle browning. The 2-3 hours of daily outdoor exposure before Christmas is equally important—it helps the tree acclimate to indoor conditions without shocking it.
Holiday Display Hack: For that 8-10 week hardening period, I recommend starting with just 1 hour of outdoor exposure and gradually increasing by 30 minutes every 3-4 days. This slow adaptation prevents needle drop when you finally bring the tree indoors. And here's a pro move: place a small humidifier near your tree during the holidays—indoor heating dries out needles faster than you'd expect.
Pro Tips for Live Potted Xmas Trees
- Here's what nobody tells you about keeping your potted holiday trees thriving year after year.
- Selection Tip: When buying your 3-5 gallon tree in early fall, inspect the root system closely. Look for white, fibro...
- Soil Mix Secret: The 50-30-20 blend of peat moss, perlite, and compost is non-negotiable for proper aeration. If you ...
Frequently asked questions
Got questions about keeping your live potted Christmas tree alive and thriving all year long?
Here are answers to the most common queries—so you can enjoy your festive greens without the stress!
Can I keep a live potted Christmas tree indoors year-round?
Yes, but with care! Most live potted trees (like Norfolk pines or Fraser firs) thrive indoors for months, but they need bright, indirect light and regular watering. For long-term indoor life, consider a dwarf Alberta spruce or lemon cypress, which adapt better to low-light spaces. Just watch for browning needles—this often signals dry air or overwatering.
How long can I keep a live potted tree before it needs repotting?
Typically, repot your tree every 2–3 years or when roots circle the pot’s base. Signs it’s time: roots growing out of drainage holes or soil drying out faster than usual. Choose a pot 1–2 inches wider than the current one and use a well-draining mix (like 60% peat, 30% perlite, 10% sand). Pro tip: Repot in early spring to avoid stressing the tree during winter dormancy.
What’s the best way to transition a live tree from indoors to outdoors?
Acclimate your tree gradually over 7–10 days to avoid shock. Start by moving it to a shaded outdoor spot for a few hours daily, then increase exposure. Avoid direct sun or frost until fully hardened off. In fall, reverse the process: bring it inside before temperatures drop below 40°F and place it in a cool, bright room to simulate winter dormancy.
Why are the needles falling off my live potted Christmas tree?
Needle drop is usually due to one of three issues:
- Underwatering: Soil feels bone-dry 1–2 inches below the surface. Water deeply until it drains from the bottom.
- Overwatering: Yellow needles + soggy soil = root rot. Let the top inch dry out between waterings.
- Stress: Sudden temperature changes, drafts, or low humidity can cause shedding. Use a humidifier nearby!
If the problem persists, check for pests (like spider mites) on the undersides of needles.
Are there low-maintenance live potted trees better for beginners?
Try these beginner-friendly options:
- Norfolk Island Pine: Tolerates low light and dry air (great for homes with pets!).
- Dwarf Alberta Spruce: Slow-growing and drought-resistant once established.
- Leyland Cypress: Fast-growing and forgiving if you forget to water occasionally.
Skip finicky varieties like blue spruce or Scotch pine unless you’re ready for extra TLC.
Wrapping up and next steps
Live potted Christmas trees are the perfect blend of holiday charm and sustainable gardening—no messy needles, no waste, and all the festive joy year-round! 🌲✨ Whether you’re a seasoned gardener or a first-time tree owner, these trees bring joy beyond December, proving that the magic of Christmas can grow with you.
Ready to make your holiday greens a permanent part of your home? Start by choosing your tree today and give your space (and the planet) a little extra love!