
Container Gardens
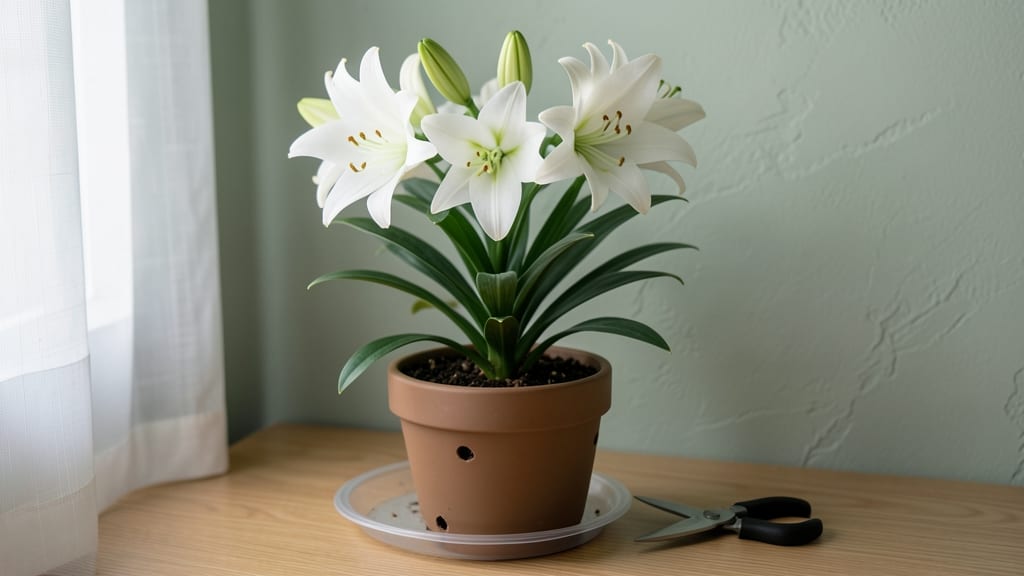
This potted lily plant transforms any space—even a sunlit apartment corner—into a fragrant, floral haven with varieties like Stargazer or Casa Blanca. 🌿 which thrive in containers without sprawling. The key is matching the right pot size to their growth habit—too small, and they’ll get root-bound before spring blooms arrive.
Start with a pot that’s at least 12 inches wide and has drainage holes, then fill it with a mix of 50% potting soil and 50% perlite or orchid bark to prevent soggy roots.
Lilies need consistent moisture but hate sitting in water—stick your finger in the soil before watering, and always empty the saucer afterward. A slow-release fertilizer in spring kickstarts blooms, while monthly liquid feedings keep them lush through summer.
By winter, your potted lily might look dormant, but with proper care, it’ll reward you with bold, fragrant blooms in late spring or early summer. The secret to longevity? Repotting every 2-3 years when roots circle the pot, and trimming back dead foliage in fall to redirect energy.
Even in low light, these plants surprise with their resilience—just don’t let them dry out completely.
For apartment gardeners or those with limited outdoor space, this setup works year-round. The trade-off? You’ll need to monitor light levels closely—if leaves yellow, it’s time to move the pot closer to a window.
With the right variety and care, your potted lily becomes a low-maintenance centerpiece that outshines any store-bought bouquet.
📚 In This Guide
- What you need
- Instructions
- Tips and common mistakes
- Wrapping up and next steps
What you need
- ● Lily bulb: 1–3 Asiatic, Oriental, or Stargazer lilies (choose based on your space and height preferences).
- ● Container: 1 pot with drainage holes (minimum 12-inch diameter for 1 bulb, 16-inch+ for clusters). Terracotta or ceramic works best.
- ● Potting mix: 1 bag well-draining soil (mix 50% potting soil + 50% perlite or orchid bark for aeration).
- ● Drainage layer: Small pebbles, gravel, or broken pottery (1–2 inches at the pot’s base).
- ● Watering can or spray bottle: For gentle hydration (avoid soggy soil!).
- ● Fertilizer: 1 balanced liquid fertilizer (10-10-10) or bulb-specific food (follow label instructions).
- ○ Gloves: 1 pair (optional but recommended—lily bulbs can be sharp!).
- ● Trowel or spoon: For planting and soil adjustments.
- ● Sunlight gauge: A low-light spot (indirect sunlight, 4–6 hours/day).
- ○ Humidity tray (optional): A shallow tray with pebbles + water to boost moisture in dry air.
- ○ Mulch (optional): Coco coir or shredded bark to retain moisture (1–2 inches after planting).
Step-by-Step guide to cultivating lilies in pots for low-light spaces
Transform your indoor space with stunning potted lilies—here’s how to keep them thriving even where natural light is limited.
🌱 Step 1: Select the Right Lily Variety and Pot
Lilies like Asiatic or Oriental hybrids adapt best to indoor conditions, especially in low-light settings. Avoid Easter lilies—they prefer bright light and struggle in dim corners. Choose a 12-16 inch pot with drainage holes; terracotta pots help regulate moisture, which is critical for preventing root rot in low-light conditions.
Fill the pot with well-draining potting mix (avoid garden soil—it compacts and suffocates roots). I like to blend one-third perlite or orchid bark into the mix to improve aeration. The pot should be only 2-3 inches larger in diameter than the root ball—too much space leads to overwatering and weak stems.
💧 Step 2: Plant and Water for Optimal Root Establishment
Dig a hole in the center of the pot twice as wide as the root ball but no deeper. Gently loosen the roots if they’re circling, then place the lily bulb so the top third remains exposed. This prevents rot while allowing new shoots to emerge. Cover with soil, leaving 1 inch of space between the soil surface and the pot rim for watering.
Water deeply until it drains from the bottom, then let excess water pool in the saucer for 10 minutes before emptying it. Lilies in low-light spaces need consistent moisture, but soggy soil invites fungal diseases. Check the soil every 3-4 days—if the top inch feels dry, water again. Yellowing leaves often signal overwatering, while crispy edges mean it’s too dry.
☀️ Step 3: Maximize Low-Light Growth with Strategic Care
Place your potted lily near an east-facing window for the softest, longest light exposure. If that’s not possible, supplement with a grow light positioned 12 inches above the plant for 12-14 hours daily. Lilies in low light grow slower, so fertilize every 4-6 weeks with a balanced liquid fertilizer (10-10-10) diluted to half-strength to avoid burning tender roots.
Rotate the pot a quarter turn weekly to ensure even growth—low-light lilies often lean toward the nearest light source. Watch for pale, elongated stems (a sign of insufficient light) and adjust immediately. Prune any yellow or brown leaves with sterilized scissors to redirect energy to new growth.
✂️ Step 4: Maintain and Revive for Year-Round Blooms
After flowering, cut the spent stem at the base but leave the foliage intact—it photosynthesizes for 6-8 weeks to nourish the bulb for next season. Reduce watering to every 5-7 days once the plant enters dormancy (usually late fall). Move the pot to a cool, dark corner (around 55-60°F) to mimic winter conditions, then resume regular care in early spring.
Every 2-3 years, repot into a slightly larger container with fresh potting mix to prevent nutrient depletion. Divide congested bulbs in early spring—gently separate offsets and replant them in individual pots. This rejuvenates growth and prevents disease buildup in crowded roots.
⏰ Step 5: Troubleshoot Common Low-Light Challenges
If your lily’s leaves yellow even with proper watering, it’s likely nutrient-deficient—switch to a low-nitrogen, high-phosphorus fertilizer (like 5-10-10) to encourage blooming. For no flowers, the light is still too dim; move closer to a window or increase grow light hours. Brown tips on leaves? Increase humidity with a pebble tray or misting—low-light spaces dry out faster.
Pests like aphids or spider mites thrive in low-light conditions. Wipe leaves with a soapy water cloth (1 tsp mild dish soap per gallon of water) weekly as prevention. If you spot white mold on the soil surface, reduce watering and improve airflow by spacing pots apart. Lilies in low light are resilient, but consistency is key—small adjustments prevent major setbacks.
Tips & tricks for thriving potted lilies in low-light
Low-light lilies reward patience and precision—here’s how to avoid common pitfalls and maximize their beauty.
Pot Selection Matters: Terracotta pots are ideal for low-light lilies because they wick moisture away from roots, preventing the fungal issues that plague plastic containers. If you must use plastic, add an extra layer of perlite to the potting mix to improve drainage. The 12-16 inch size range is perfect—any smaller restricts root growth, while larger pots encourage overwatering. I’ve found that glazed ceramic pots work well too, but check for drainage holes or drill them yourself.
Light Supplementation Strategy: If your east-facing window isn’t an option, position a grow light 12 inches above the plant and run it for the full 12-14 hours daily. LED grow lights are energy-efficient and emit the full spectrum needed for photosynthesis. For best results, place the light on a timer—this consistency mimics natural daylight cycles and prevents the leggy growth that signals light deprivation. I’ve seen dramatic improvements when moving from inconsistent natural light to timed grow light exposure.
Watering Precision: The 10-minute drainage rule in Step 2 is non-negotiable for low-light lilies. After watering, always check the saucer—if water remains after 10 minutes, your pot lacks proper drainage. For extra insurance, elevate pots on saucers with feet to prevent sitting in standing water. In winter months, when indoor air is drier, you might need to water every 5 days instead of the usual 3-4 day schedule, but always verify by checking soil moisture.
Fertilizer Timing: The 4-6 week fertilization window is perfect for low-light lilies, but timing matters. Apply fertilizer just as new growth begins in spring, not during dormancy. I’ve found that a slow-release fertilizer pellet works well—just follow package instructions for application rates. If you notice crispy leaf edges after fertilizing, flush the soil with water to prevent salt buildup, which is especially problematic in low-light conditions where plants grow more slowly.
Pro Tips for Lily Potted Plant
- Low-light lilies reward patience and precision—here’s how to avoid common pitfalls and maximize their beauty.
- Pot Selection Matters: Terracotta pots are ideal for low-light lilies because they wick moisture away from roots, pre...
- Light Supplementation Strategy: If your east-facing window isn’t an option, position a grow light 12 inches above the...
Frequently asked questions
Got questions about keeping your lily potted plant thriving? You’re not alone! Here are some of the most common concerns—plus quick, practical answers to keep your low-light beauty blooming year-round.
How often should I water my potted lily?
Water your lily when the top 1–2 inches of soil feel dry to the touch. Overwatering is the #1 killer—ensure the pot has drainage holes to prevent soggy roots. In low-light spaces, watering every 7–10 days is usually enough, but adjust for humidity (less in dry air, more in damp rooms).
Can I keep a lily indoors all year?
Lilies are adaptable, but they’ll thank you for a cool winter break (50–60°F) if possible. Move them near a bright window (even indirect light works) and reduce watering. With proper care, they’ll reward you with spring blooms. Pro tip: Rotate the pot monthly for even growth!
Why aren’t my lily leaves turning green?
Pale or yellowing leaves often mean low light or nutrient deficiency. Boost light with a grow bulb or move to a brighter spot (but avoid harsh sun). Feed with a balanced liquid fertilizer (20-20-20) every 4–6 weeks in growing season. Yellow edges? Check your water—chlorine or fluoride can burn leaves!
What’s the best alternative for low-light lilies?
If lilies struggle in your space, try these low-light superstars:
- Peace Lily (Spathiphyllum): Thrives in dim corners, blooms white "flowers."
- Snake Plant (Sansevieria): Nearly indestructible, purifies air.
- ZZ Plant (Zamioculcas): Glossy leaves, drought-tolerant.
Are lilies toxic to pets?
Yes!
Most lilies (Lilium and Hemerocallis varieties) are toxic to cats and dogs, causing kidney failure. If you have pets, opt for pet-safe alternatives like Spider Plants or Boston Ferns. Keep lilies out of reach—even pollen is dangerous.
How do I revive a drooping potted lily?
Wilting usually means thirst or root stress. First, check the soil—water deeply if dry. If the pot feels heavy (root rot), repot in fresh soil and trim mushy roots. Boost humidity with a pebble tray or misting. No blooms? It might need more light or a dose of fertilizer!
Wrapping up and next steps
Bringing a lily potted plant into your home isn’t just about adding beauty—it’s about creating a thriving, low-maintenance oasis that blooms with grace year-round. 🌿 Whether you’re a seasoned gardener or a beginner, lilies adapt effortlessly to indoor spaces, purifying the air and lifting your spirits with their stunning petals.
Now that you’re equipped with the right tools and answers to common questions, it’s time to roll up your sleeves and get growing!
🌱 Your Next Step: Plant with Confidence!
Pick your favorite lily variety, gather your supplies, and watch your indoor garden flourish. Share your progress with fellow plant lovers—tag us or join a community to swap tips and celebrate every bloom! 🌸