Container Gardens
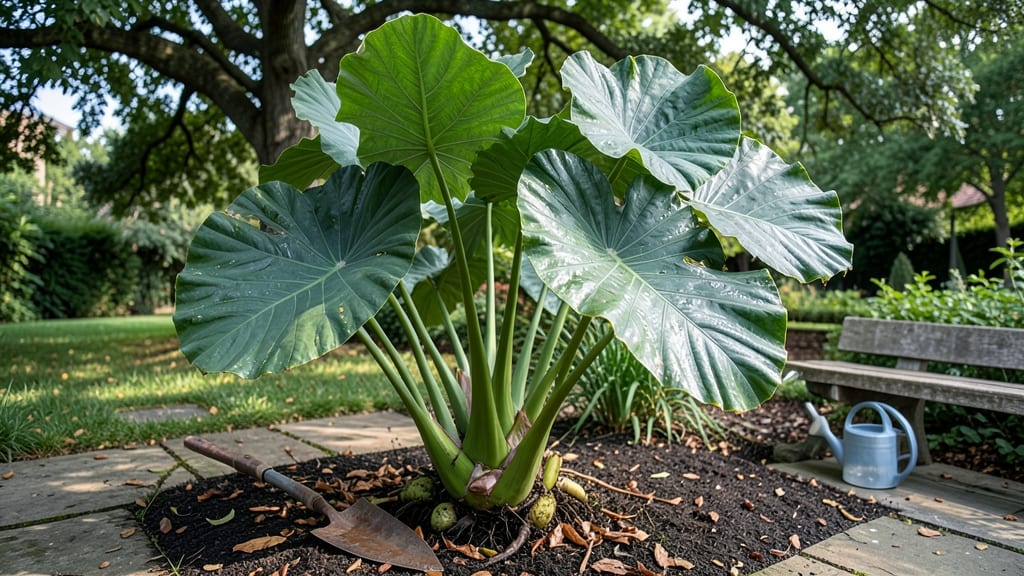
Growing potted elephant ear plants means bold foliage that turns heads—even in small spaces. 🌿 I’ve mastered the trick of keeping these tropical stunners thriving in containers, and it comes down to three things: the right pot, soil that stays moist but never soggy, and a spot where they can soak up bright, indirect light.
The key is mimicking their natural habitat without overcomplicating it.
Start with a container at least 12 inches wide and deep, with drainage holes to prevent root rot—the #1 killer of potted elephant ears. Use a well-draining potting mix rich in organic matter, like a blend of peat moss, perlite, and compost.
These plants drink water like there’s no tomorrow, so check soil moisture daily in summer and reduce to twice weekly in cooler months. Overwatering is the silent saboteur of lush leaves.
By summer’s end, you’ll have glossy, heart-shaped leaves that reach 2 feet wide, with the right care. The secret? A balanced liquid fertilizer every 4-6 weeks during active growth, and a winter rest period indoors where temps stay above 50°F.
Even in pots, they’ll reward you with dramatic foliage that outshines most garden center displays.
For winter survival, move containers indoors near a bright window or under grow lights, and cut back on watering. Watch for spider mites on the undersides of leaves—spray with water to deter them—and avoid drafts, which cause leaf scorch.
With these adjustments, your potted elephant ears will bounce back stronger each spring, ready to steal the show again.
📚 In This Guide
- What you need
- Instructions
- Tips and common mistakes
- Wrapping up and next steps
What you need
- ● Potted Elephant Ear Plant: Choose a healthy tuber or young plant (Colocasia or Alocasia species). Pro tip: Look for firm, blemish-free tubers!
- ● Container: Size: 12–18 inches in diameter (deeper for tubers).
- ● Drainage: At least 3–4 drainage holes. No drainage = root rot risk!
- ● Material: Terracotta (breathable) or plastic (retains moisture longer).
- ● Potting Mix: 1 bag (5–10 quarts) of well-draining, peat-based mix (amend with perlite or orchid bark for aeration).
- ● Tuber or Plant: 1 healthy specimen (check for pests or damage before planting!).
- ● Watering Can: With a gentle spray nozzle (to avoid displacing soil).
- ● Slow-Release Fertilizer: 1–2 tbsp of balanced granular fertilizer (10-10-10) or organic options like worm castings.
- ● Mulch: 1–2 inches of shredded bark or coconut coir to retain moisture.
- ● Support Stakes: 1–2 bamboo stakes (for tall varieties like Alocasia).
- ● Decorative Stones: Pebbles or river rocks (for a tropical aesthetic).
- ● Liquid Fertilizer: Diluted fish emulsion or seaweed extract (every 4–6 weeks).
- ● Grow Lights: LED grow bulb (if indoors with <10 hours of sunlight/day).
Step-by-step guide to growing stunning potted elephant ear plants
Here's how to grow these tropical showstoppers in containers—no greenhouse needed.
🌱 Step 1: Choose the Right Container and Soil Mix
Elephant ears need room to spread, so pick a container at least 18 inches wide with drainage holes. I use a heavy ceramic pot to prevent tipping from the plant's size. Fill the bottom third with orchid bark or perlite for drainage—these plants rot easily if their roots sit in soggy soil.
Use a lightweight, airy potting mix blended with 30% perlite or coconut coir. The mix should feel fluffy when moistened, like a damp sponge. Avoid garden soil—it compacts and suffocates roots. For four plants, you'll need about 2 cubic feet of mix total.
☀️ Step 2: Plant Tubers at the Correct Depth
Elephant ear tubers have a natural top—plant with the eyes (growth points) facing upward, about 2 inches below the soil surface. Burying them too deep delays growth, while planting too shallow exposes them to drying out. I press the tuber gently into place, then fill around it with soil, leaving 1 inch of space between the tuber and the pot rim.
Water thoroughly until moisture runs from the drainage holes. The soil should feel like a wrung-out sponge—not dripping, but consistently damp. After planting, place the pot in a spot with bright, indirect light for the first week while roots establish.
💧 Step 3: Water and Fertilize for Rapid Growth
Keep the soil evenly moist but never soggy. I water when the top 1-2 inches feel dry to touch. Overwatering is the #1 killer—yellowing leaves signal roots struggling for air. In summer, I water daily; in cooler months, every 2-3 days suffices.
Feed with a balanced liquid fertilizer (10-10-10) every 4-6 weeks during the growing season. I dilute it to half-strength to avoid burning tender roots. When new leaves unfurl, you'll see the bold, velvety texture that makes elephant ears so striking.
✂️ Step 4: Prune and Support for Maximum Impact
Remove any yellow or damaged leaves immediately with clean scissors to prevent disease. When foliage grows too large for the pot, I trim the largest leaves at the base to redirect energy to new growth. Never cut more than 1/3 of the plant at once—this stresses the tuber.
For extra-large varieties, add a sturdy bamboo stake at planting to support heavy leaves. Tie stems loosely with soft plant ties as they grow. In fall, when leaves yellow naturally, reduce watering and let the plant rest—it'll store energy in the tuber for next season.
🪴 Step 5: Overwinter Tubers for Next Year
When frost threatens, cut back foliage to 2 inches above the soil. Dig up tubers carefully, shake off soil, and let them dry in a shady spot for 3-5 days. Store in a paper bag with dry peat moss or coconut coir in a cool (50-60°F), dark place until spring.
I label each tuber with a permanent marker before storing—by next spring, you won't remember which was which! In spring, replant tubers 2 weeks before last frost when soil warms to 60°F.
Tips & tricks for growing stunning potted elephant ear plants
Here's what nobody tells you about keeping these tropical beauties thriving in containers.
The Container Factor: That 18-inch minimum width isn't just a suggestion—it's critical for root spread. I've learned the hard way that narrower pots lead to crowded roots and stunted growth. If you're working with smaller containers, choose dwarf varieties specifically bred for compact growth. For extra stability with large varieties, place a small bag of sand or gravel in the bottom before adding your drainage layer—this prevents tipping when those massive leaves unfurl.
Soil Science: The 30% perlite or coconut coir blend isn't just about drainage—it's about aeration. I've seen elephant ears struggle in dense mixes that don't allow oxygen to reach the roots. To test your mix, squeeze a handful: it should hold its shape but crumble easily when released. If it stays compact, add more perlite. For four plants, remember that 2 cubic feet of mix is about right—don't skimp, or you'll end up with root-bound plants that wilt quickly.
Planting Precision: Those 2 inches below soil surface for the tuber eyes are non-negotiable. I once buried mine 3 inches deep out of habit, and it took nearly 3 weeks for any growth to appear. The key is to position the tuber so the eyes face upward but aren't exposed once soil is added. After planting, give the pot a gentle shake—you should hear the tuber settle into place without rattling. This ensures proper contact with the soil for root initiation.
Watering Wisdom: The "wrung-out sponge" test is your best friend. I keep a small spray bottle handy to check moisture levels between waterings. In summer heat, I actually set a timer for daily water checks—these plants can dry out surprisingly fast in containers. The moment the top 1-2 inches feel dry, it's time to water. Pro tip: Water in the morning so leaves have time to dry before evening, reducing fungal risks.
Pro Tips for Potted Elephant Ear Plant
- Here's what nobody tells you about keeping these tropical beauties thriving in containers.
- The Container Factor: That 18-inch minimum width isn't just a suggestion—it's critical for root spread. I've learned ...
- Soil Science: The 30% perlite or coconut coir blend isn't just about drainage—it's about aeration. I've seen elephant...
Frequently asked questions
Got questions about growing potted elephant ear plants? You’re not alone! Here are answers to the most common queries to help your bold foliage thrive in containers.
How often should I water my potted elephant ear plant?
Keep the soil consistently moist but not soggy—water when the top 1-2 inches feel dry. In hot weather, you may need to water daily, while cooler months can stretch it to every 2-3 days. Pro tip: Use a moisture meter or stick your finger in the soil to check!
Can elephant ear plants survive winter in pots?
Most varieties are tropical and won’t tolerate frost. Before temperatures drop below 50°F (10°C), move your pots indoors to a bright, humid spot (like a sunroom or greenhouse). If you must leave them outside, wrap the pots in burlap for insulation.
Why are my elephant ear leaves turning yellow?
Yellowing leaves usually signal overwatering or poor drainage. Check for root rot by gently lifting the plant—if the roots smell foul or look mushy, repot in fresh, well-draining soil. Fix it fast: Reduce watering and ensure pots have drainage holes!
What’s the best container size for an elephant ear plant?
Aim for a pot at least 12-18 inches wide and deep—these plants have large roots! Smaller pots restrict growth, while oversized ones can cause soil to stay too wet. Upgrade tip: Add a saucer to catch excess water and prevent root rot.
Are there dwarf or compact elephant ear varieties for small spaces?
Yes! Look for Alocasia ‘Polly’ or Colocasia ‘Black Magic’—both stay smaller (1-2 feet tall) and work well in containers. Just ensure they get bright, indirect light and consistent moisture to thrive in tight spaces.
How do I prevent pests like spider mites or aphids?
Inspect leaves regularly for tiny webs or sticky residue. Spray infested areas with neem oil or insecticidal soap, and keep humidity high (they hate dry air!). Prevention hack: Mist leaves weekly and avoid overcrowding plants.
Wrapping up and next steps
Growing a potted elephant ear plant is a rewarding way to add drama and tropical flair to your container garden—no green thumb required! 🌿 With the right soil, sunlight, and care, these bold beauties will thrive year after year.
Whether you’re a beginner or a seasoned gardener, your effort will pay off with stunning, oversized leaves that turn heads.
Ready to take the next step? Start small: Pick your favorite variety (like Colocasia or Alocasia), grab a container, and experiment with colors and textures. Before you know it, your patio or balcony will be a lush, eye-catching oasis! 🌟