
Pruning
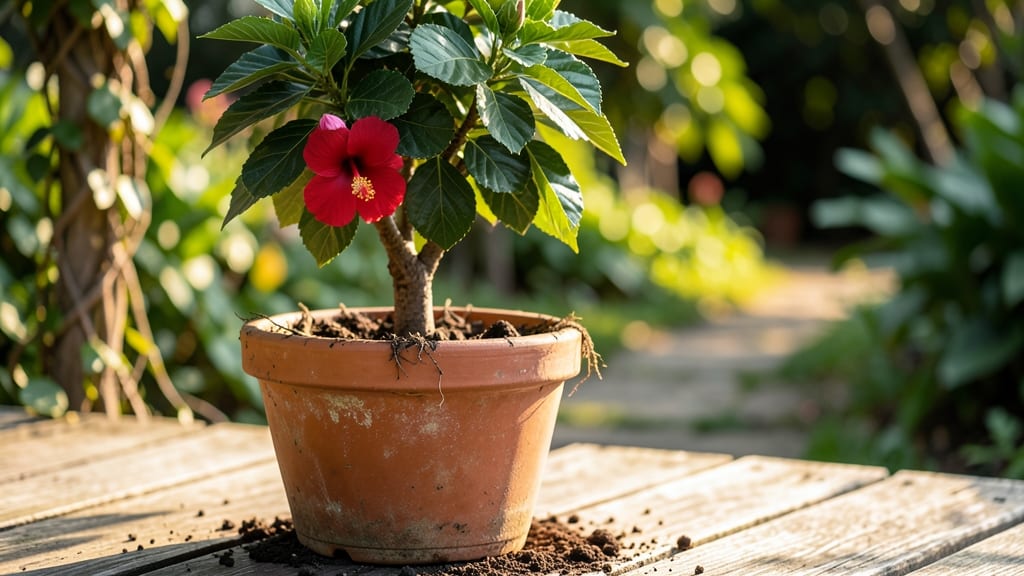
Potting a hibiscus tree transforms it from a struggling plant to a blooming superstar. 🌺 The right pot, soil, and drainage don’t just prevent root rot—they unlock those vibrant red blooms you’ve been dreaming of year-round. I’ve repotted mine three times, and the difference in growth is night-and-day.
Start with a pot 2-3 inches larger than the current root ball, and always use a mix of peat moss, perlite, and native soil for airflow. Hibiscus hate soggy roots, so add a layer of gravel at the bottom—this is non-negotiable.
My first mistake? Skipping drainage holes. Now I double-check before every repotting.
After transplanting, keep the soil lightly moist (not soaked) for the first 2 weeks, and place it in bright, indirect light. You’ll see new leaves within a month, and by summer, those blooms will make your neighbors jealous.
The key is patience—hibiscus reward consistent care with bold, long-lasting flowers.
Seasonal tip: Repot in early spring before new growth starts, and avoid heavy fertilizing right after. Overwatering in winter is the #1 killer—let the top inch dry out between waterings. Trust the process, and you’ll have a hibiscus that blooms like clockwork.
📚 In This Guide
- What you need
- Instructions
- Tips and common mistakes
- Wrapping up and next steps
What you need
- ● Container or Pot: Choose a pot 3–5 inches larger in diameter than the root ball (e.g., 12–18 inches for a mature hibiscus). Ensure it has drainage holes (or drill them yourself!).
- ● High-Quality Potting Mix: Use a well-draining blend (60% peat moss/coir, 30% perlite/pumice, 10% compost). Avoid garden soil—hibiscus hates soggy roots!
- ● Gravel or Ceramic Shards: A 1-inch layer at the pot’s base for extra drainage.
- ● Pruning Shears or Sharp Knife: For trimming tangled roots (sterilize with rubbing alcohol!).
- ● Garden Gloves: Protect your hands—hibiscus roots can be sharp!
- ● Watering Can or Hose with Gentle Setting: Hibiscus loves hydration but not drowning.
- ● Slow-Release Fertilizer: Pellets or spikes (e.g., 14-14-14 NPK ratio) to kickstart growth.
- ● Mulch: A light layer of orchid bark or pine needles to retain moisture.
- ● Support Stake: If your hibiscus is top-heavy (e.g., bamboo stake + soft tie).
- ● pH Test Kit: Hibiscus thrives in acidic soil (pH 6.0–6.5)—adjust with lime or sulfur if needed.
How to pot a hibiscus tree for lush, continuous blooms
Here’s my foolproof method for repotting hibiscus—focused on airflow and drainage to keep those vibrant blooms coming year-round.
🪴 Step 1: Select the Right Container for Optimal Airflow
Choose a pot that’s only 2-3 inches larger in diameter than the current root ball—hibiscus hate excess space, which leads to soggy soil and root rot. I recommend unglazed terra cotta for its natural breathability, but if using plastic, drill 2-3 additional drainage holes along the sides near the base. The pot should have handles or a wide base—hibiscus top-heavy blooms need stability.
Measure the current root ball by gently lifting the plant and checking how much soil clings to the roots. If the pot feels too tight (roots circling the edge), upgrade by one size only. If it’s too loose, skip repotting—hibiscus stress easily when disturbed unnecessarily.
💧 Step 2: Prepare the Soil Mix for Hibiscus Needs
Hibiscus demand fast-draining, slightly acidic soil (pH 6.0-6.5). Mix equal parts peat moss, perlite, and garden soil—this blend prevents compaction while retaining enough moisture for tropical roots. Avoid heavy potting mixes; they’ll suffocate your plant within weeks. I add a slow-release fertilizer (10-10-10) to the bottom 1 inch of soil for a nutrient boost during the transition.
Moisten the mix until it’s damp like a wrung-out sponge—not soggy, not dry. Hibiscus roots are sensitive to sudden moisture changes, so pre-watering ensures even distribution when you pot. Tap the container gently on the table to settle the soil without compacting it. Leave 1 inch of space between the soil surface and the pot’s rim for watering.
✂️ Step 3: Gently Remove and Prune the Root Ball
Water the hibiscus 24 hours before repotting—this softens the root ball, making it easier to extract without breaking roots. Turn the pot upside down, grip the base firmly, and tap the sides if needed. If roots are circling tightly, use a sterilized knife to loosen the outer inch—this encourages outward growth. Trim any brown, mushy roots immediately; healthy roots are firm and white.
Shake off 20% of the old soil from the root ball to prevent compaction. Hibiscus roots are shallow but extensive—don’t disturb the center too much. If you see root-bound clusters, gently tease them apart with your fingers. This step is critical: over-pruning shocks the plant, while under-pruning traps it in the old pot’s growth pattern.
🌱 Step 4: Pot and Water for Immediate Stability
Place the hibiscus in the new pot and fill one-third of the space with soil. Gently press the plant to the center, then add more soil around the edges, tamping lightly to eliminate air pockets. The root flare (where roots meet the stem) should sit just above the soil line—burying it invites rot. Fill the rest of the pot, leaving that 1-inch gap at the top.
Water slowly and deeply until liquid drains freely from the bottom holes. Hibiscus need 1-2 inches of water per week, but they hate soggy feet. After watering, place the pot in a shaded area for 3-5 days to reduce transplant shock. Resume morning sun exposure gradually—full sun too soon causes leaf scorch.
☀️ Step 5: Adjust Light and Care for Post-Potting Recovery
Hibiscus thrive in bright, indirect light for the first 2-3 weeks after repotting. If indoors, position near a south-facing window but avoid direct midday sun. Outdoors, choose a sheltered spot with dappled shade. You’ll notice new leaf growth in 7-10 days—this is your signal the plant is recovering. If leaves yellow or wilt, it’s a sign of overwatering or root stress.
Resume fertilizing every 4-6 weeks with a balanced liquid fertilizer once the plant shows new blooms. Hibiscus are heavy feeders, but never fertilize stressed plants—wait until you see fresh foliage. Prune spent blooms immediately to encourage more flowers. With the right pot and care, your hibiscus will rebound with bold blooms in 6-8 weeks—worth the effort!
Tips & tricks for perfect hibiscus repotting
Real talk: Repotting hibiscus can feel intimidating, but these details make all the difference between a stressed plant and one that thrives.
Container Stability Matters: In Step 1, when selecting your pot, prioritize stability over aesthetics. The top-heavy nature of hibiscus blooms means a wide base or handles are non-negotiable. I've seen beautiful narrow pots topple over after just a few days of heavy blooms—trust me, it's not worth the risk. For outdoor pots, consider adding small weights to the base or securing them with stakes if needed. The 2-3 inch size upgrade rule applies strictly to diameter, not height—taller pots create drainage issues.
Soil Texture is Everything: The equal parts peat moss, perlite, and garden soil mix in Step 2 isn't just arbitrary—it's about creating the perfect balance of aeration and moisture retention. When mixing, I sift the components together rather than layering them. This ensures uniform distribution throughout the pot. For the dampness test, imagine squeezing a kitchen sponge—your mix should feel like that, not like a wet washcloth. The 1-inch gap at the top isn't just for watering; it prevents soil from splashing out when you water deeply.
Root Pruning Strategy: In Step 3, the 24-hour pre-watering is your secret weapon for easier extraction. I've learned this the hard way after wrestling with dry, brittle roots that snapped under pressure. When loosening circling roots, work gently but deliberately—think of it like untangling headphones rather than hacking through with a knife. The 20% soil removal rule helps prevent compaction, but don't be tempted to clean roots completely unless you're dealing with severe root rot. Healthy roots should have some old soil clinging to them.
Post-Potting Recovery Hack: The 3-5 day shaded recovery period in Step 4 is where most people rush and regret it. Instead of moving your plant back to full sun immediately, I recommend creating a gradual transition. Place your hibiscus near a north-facing window indoors or under 50% shade cloth outdoors. This mimics natural conditions and prevents the shock of sudden light exposure. The 7-10 day window for new leaf growth is your best indicator of successful repotting—if you don't see this, revisit your soil mix or watering habits.
Pro Tips for Potting A Hibiscus Tree
- Real talk: Repotting hibiscus can feel intimidating, but these details make all the difference between a stressed pla...
- Container Stability Matters: In Step 1, when selecting your pot, prioritize stability over aesthetics. The top-heavy ...
- Soil Texture is Everything: The equal parts peat moss, perlite, and garden soil mix in Step 2 isn't just arbitrary—it...
Frequently asked questions
Got questions about potting your hibiscus tree? You’re not alone! Here are answers to the most common queries—so you can keep your tropical beauty thriving with confidence.
When is the best time to repot a hibiscus tree?
Repot your hibiscus in early spring (just as new growth starts) or late winter. Avoid repotting during flowering or extreme heat—stress can drop buds! If roots are circling or soil depletes nutrients, act in fall, but skip winter unless urgent.
Why is my hibiscus dropping leaves after repotting?
Leaf drop is normal for 1–2 weeks post-repotting due to transplant shock. To minimize stress: water lightly, avoid direct sun for a week, and ensure proper drainage. If yellowing persists or new leaves wilt, check for root rot (mushy roots = overwatering).
Can I grow a hibiscus tree in a container year-round?
Yes! Hibiscus thrives in containers with 5+ gallons of space and well-draining soil. Move it outdoors in spring/summer (6+ hours of sun) and bring it inside (60–70°F) when temps drop below 50°F. Use a humidifier or pebble tray to combat dry indoor air.
What’s the difference between potting soil and regular soil for hibiscus?
Hibiscus needs airy, acidic soil (pH 5.5–6.5) with 30–40% perlite/pine bark for drainage. Regular garden soil compacts, causing root rot. Mix 2 parts potting mix + 1 part perlite + a handful of orchid bark for the perfect blend.
Do I need to prune my hibiscus before or after repotting?
Prune before repotting to remove dead/diseased branches and shape the plant. Trim back 1/3 of leggy growth to encourage bushiness. Avoid heavy pruning post-repotting—focus on watering and acclimation first. Use sterilized shears to prevent infections!
Wrapping up and next steps
Potting your hibiscus tree is all about giving it the ideal home—one with great airflow, proper drainage, and just the right mix of love and care. 🌸 With the right soil, container, and a little patience, you’ll be rewarded with vibrant blooms year-round.
Don’t let a few setbacks discourage you; even seasoned gardeners face challenges, and every hibiscus expert started somewhere!
Now that you’re armed with the know-how, take the next step—grab your tools and get potting! Watch your hibiscus thrive, and soon, you’ll be sharing your stunning blooms with neighbors (or bragging on social media 📸). Happy planting!