
Planting
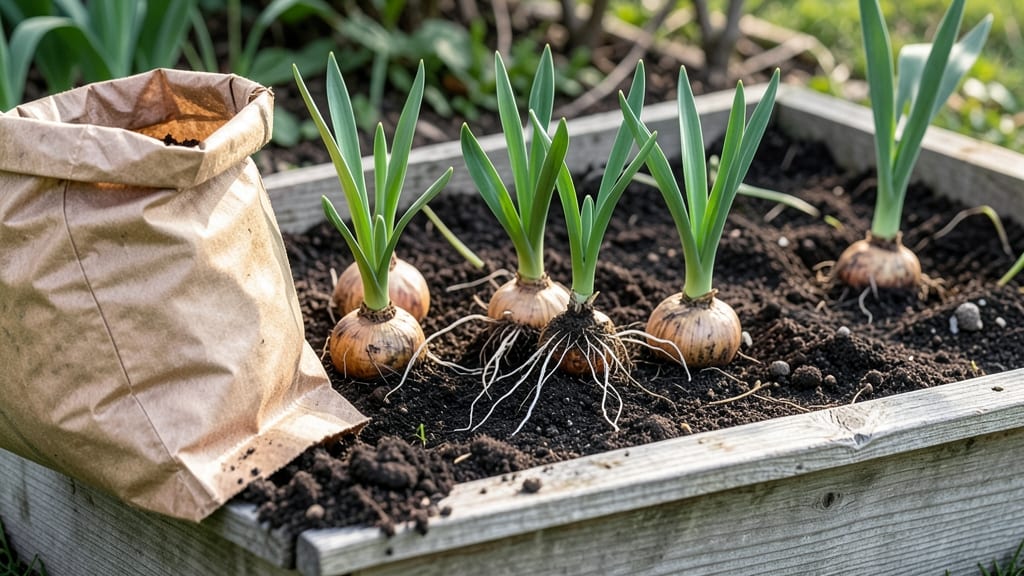
My perfect potting mix for bulbs starts with the right balance—light enough to breathe, yet rich enough to feed. 🌱 The secret lies in an airy, chunky blend that mimics woodland soil, where bulbs thrive naturally. Too dense, and roots suffocate; too sandy, and nutrients wash away.
I’ve settled on a 50-50 mix of peat-based compost and perlite, with a handful of worm castings for that extra boost. The magic happens when you combine organic matter with drainage. Perlite or coarse sand keeps roots from drowning, while coco coir or compost holds moisture without compacting.
For repotting, I add a slow-release bulb fertilizer—just a sprinkle—to give those hungry roots a head start. No more guesswork, no more wilted blooms. You’ll see the difference in stronger stems and vibrant blooms by spring. The mix stays loose even when wet, letting oxygen reach every root.
And when you repot, those bulbs won’t protest—just plop them in, water gently, and watch them settle. For troubleshooting, waterlogging is the enemy. If your mix feels like mud, add more perlite. Poor growth? Check for compacted soil—fluff it up with extra compost.
This blend works for daffodils, tulips, or even those tricky paperwhites. Let’s get those bulbs growing!
📚 In This Guide
- What you need
- Instructions
- Tips and common mistakes
- Wrapping up and next steps
What you need
- ● Base Soil: 50% peat moss or coco coir (holds moisture without compacting)
- ● Drainage Boost: 25% perlite or pumice (prevents waterlogging)
- ● Nutrient Base: 25% compost or well-rotted manure (for organic fertility)
- ○ Optional Amendments: 1 tbsp bulb fertilizer (high in phosphorus for root growth)
- ● 1 cup sand (for extra grit in heavy soils)
- ● Large mixing container (5-gallon bucket or wheelbarrow)
- ● Garden trowel or shovel (for blending)
- ● Measuring cups or scale (for precise ratios)
- ● Gloves (to keep hands clean)
- ● Pot or container with drainage holes (if repotting)
Step-by-Step guide to mixing potting soil for bulbs
Here's how to create the ideal airy, draining blend bulbs crave—no guesswork involved.
🌱 Step 1: Gather the Core Components
Start with 50% premium potting mix as your base—this provides essential nutrients while staying lightweight. I always use a sterile, peat-based mix to prevent fungal issues that can rot bulb roots before they even sprout. The remaining 50% will be your drainage enhancers to prevent soggy soil.
For that second half, combine 25% perlite (for aeration) and 25% coarse sand (for grit). The perlite creates tiny air pockets roots need to breathe, while the sand prevents compaction. Measure carefully—too much sand makes the mix too gritty, while too much perlite drains too quickly and leaches nutrients.
🌿 Step 2: Add Bulb-Specific Amendments
Mix in 10% worm castings for gentle, slow-release nutrients that won't burn tender bulb roots. This is where the magic happens—castings improve soil structure while feeding microbes that bulbs rely on. I sift mine to remove any large chunks that could disrupt the even texture.
For extra insurance, add 5% horticultural charcoal (about 1 cup per 4 gallons of mix). This filters out impurities, prevents souring, and keeps the blend fresh longer. The charcoal also helps regulate moisture—critical for bulbs that rot easily when overwatered.
⏰ Step 3: Layer and Blend for Uniformity
In a large bin, spread half the potting mix on the bottom. Then layer in half the perlite, half the sand, and all the amendments in this order: worm castings first (to distribute nutrients evenly), then charcoal (to absorb any excess moisture), and finish with the remaining perlite and sand. This prevents clumping and ensures each shovel of mix has balanced properties.
Use a garden trowel to gently fold everything together until the blend looks uniform—no streaks of sand or charcoal should remain. Press lightly to eliminate air pockets, but don't compact. The final texture should feel like damp sandpaper: firm enough to hold shape when squeezed, but crumbly enough to let water drain through instantly.
💧 Step 4: Test and Adjust the Blend
Fill a small container with your mix and water it thoroughly. If water pools on top after 10 minutes, add more perlite (about 1 cup per 4 gallons) to improve drainage. If it drains too quickly and doesn't hold moisture at all, mix in an extra 10% potting mix to retain a bit more water without suffocating roots.
Stick your finger into the damp mix—it should feel cool and slightly gritty, not slimy or dry. The ideal blend will hold moisture like a well-wrung sponge: damp but never soggy. This is your signal the mix is perfect for bulbs, which despise both drought and waterlogged conditions.
☀️ Step 5: Store and Use Immediately
Keep your custom blend in a sealed container for up to 3 months—longer exposure to air degrades the worm castings and charcoal. Label it clearly with the date and components, since store-bought mixes often contain additives that can harm bulbs. When planting, fill containers 2/3 full with this blend, leaving room for bulbs to settle without being buried too deep.
Here's the thing—this mix works for every bulb type, from daffodils to tulips. The key is consistency: whether you're repotting hyacinths or growing paperwhites, this airy, nutrient-rich blend gives roots the perfect environment to establish before spring blooms. And that's what makes it perfect.
Tips & tricks for perfect potting soil for bulbs
Took me years of trial-and-error gardening to master this—here's what actually makes the difference between thriving bulbs and sad, rotting roots.
The Layering Secret: In Step 3, that specific order of worm castings → charcoal → perlite/sand isn't arbitrary. The castings need to be first so nutrients distribute evenly throughout the entire mix as you fold. Charcoal goes next because it absorbs moisture from the castings, preventing clumping. Save the perlite and sand for last—they're your structural anchors that prevent compaction when you press the mix lightly. Trust me, skipping this order leads to uneven moisture distribution and weak root development.
Texture Test: That "damp sandpaper" description in Step 3 isn't just poetic—it's the gold standard. To check consistency, squeeze a handful firmly: it should hold shape but crumble when you tap it gently. If it feels like wet sand, add more perlite (about 1 cup per 4 gallons). If it feels dry and powdery, mix in an extra 10% potting mix. This texture is what prevents both overwatering and underwatering, the two biggest killers of bulb roots.
Storage Wisdom: The 3-month shelf life in Step 5 is non-negotiable, but here's the pro move: store your mix in airtight containers with a layer of horticultural charcoal on top. This extra layer acts as a moisture barrier and prevents oxidation of the worm castings. I also label each container with the date and a quick note about the bulb types it's best for—daffodils, tulips, or paperwhites—so I don't mix them up later.
Pro Tips for Potting Soil For Bulbs
- Took me years of trial-and-error gardening to master this—here's what actually makes the difference between thriving ...
- The Layering Secret: In Step 3, that specific order of worm castings → charcoal → perlite/sand isn't arbitrary. The c...
- Texture Test: That "damp sandpaper" description in Step 3 isn't just poetic—it's the gold standard. To check consiste...
Frequently asked questions
Got questions about choosing and using the perfect potting soil for bulbs? You're not alone! Here are some of the most common queries—and their expert answers—to help you grow thriving bulbs with confidence.
What’s the best potting soil mix for bulbs like tulips, daffodils, or hyacinths?
For most bulbs, a well-draining mix with 50% peat moss or coconut coir, 30% perlite or vermiculite, and 20% compost or worm castings works wonders. Avoid heavy garden soil—it compacts and suffocates roots. Pro tip: Add a handful of sand (if your local sand isn’t clay-heavy) to boost aeration!
When is the ideal time to plant bulbs in potting soil?
Plant fall-blooming bulbs (tulips, daffodils) in late summer to early fall (6–8 weeks before frost). Spring-bloomers like crocuses or snowdrops can go in early fall or late winter. Key rule: Bulbs need 4–6 weeks of cool temps to root before growth spurts. Rush it, and you’ll stunt their beauty!
Can I reuse potting soil for bulbs year after year?
Not ideal! Old soil loses structure, depletes nutrients, and may harbor fungal diseases. Refresh it by sifting out debris and amending with 20% new compost + perlite. For a full reset, repot bulbs into fresh mix every 2–3 years to prevent root-bound stress.
What if my bulbs rot or mold in potting soil?
Overwatering or poor drainage is usually the culprit. Fix it fast:
- Check your pot—does it have drainage holes?
- Let the top 1–2 inches of soil dry between waterings.
- Add orchid bark or rice hulls (10%) to improve airflow.
Are there budget-friendly alternatives to premium bulb potting mixes?
DIY a cost-effective blend with:
- 50% peat moss or shredded coconut coir (cheaper than bags of potting soil).
- 30% coarse sand or perlite (pick up perlite in bulk for savings).
- 20% compost or well-rotted manure (free from garden waste!).
Wrapping up and next steps
Choosing the right potting soil for bulbs is the secret to vibrant blooms and healthy root systems—your bulbs will thank you! 🌱 A well-draining, airy mix with organic matter ensures they thrive without rot or stress.
Now that you’re armed with the perfect blend, it’s time to dig in (literally!) and give your garden the boost it deserves.
Ready to plant? Start with your bulbs today—whether it’s daffodils, tulips, or hyacinths—and watch your garden transform! For extra tips, check out our guide on planting techniques next.