
Companion Plants
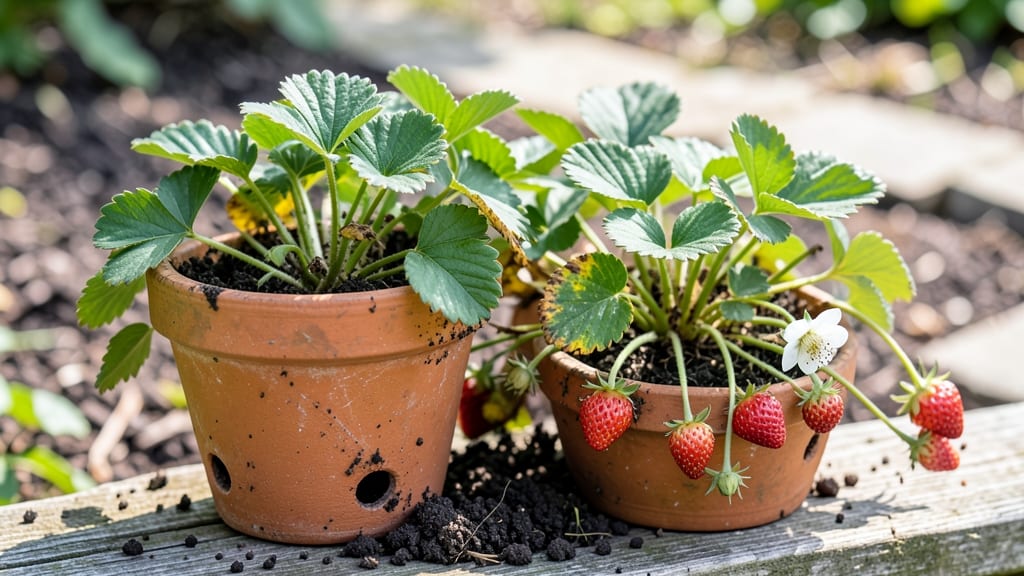
Repotting strawberry plants in early spring gives them space to grow—and your harvests will thank you. 🌱 I’ve learned the hard way that crowded roots mean smaller berries, so I now repot every 2-3 years to keep my plants thriving.
The key is timing, gentle handling, and the right container to prevent stress.
You’ll need a larger container (at least 12 inches deep), fresh potting mix with good drainage, and a sunny spot after repotting. Strawberries hate soggy roots, so mix in perlite or sand to keep water flowing.
I use a 5-gallon bucket for each plant and fill it halfway with soil before transferring.
After repotting, water deeply to settle the roots, then keep the soil lightly moist for 2 weeks while the plant recovers. You’ll see new growth in 3-4 weeks, and by next season, your berries will be bigger and more abundant.
The secret? Don’t rush—let the roots adjust before expecting a full harvest.
Common mistakes include overcrowding (stick to one plant per container) or using garden soil (it compacts and drains poorly). If your plants look stressed after repotting, trim any yellow leaves and give them extra shade for a few days. Patience pays off—your strawberries will reward you with sweeter, juicier fruit.
📚 In This Guide
- What you need
- Instructions
- Tips and common mistakes
- Wrapping up and next steps
What you need
- ● New containers: 1-2 containers per plant (10–12 inches deep, with drainage holes). Pro tip: 💡 Use fabric grow bags or plastic pots for flexibility.
- ● High-quality potting mix: 1–2 bags (sterile, well-draining mix with perlite or compost). Avoid garden soil!
- ● Pruning shears or scissors: 1 pair (sterilized with rubbing alcohol).
- ● Gloves: 1 pair (to protect from thorns and soil-borne pathogens).
- ● Watering can or hose: With a gentle spray nozzle.
- ● Slow-release fertilizer: 1 packet (balanced 10-10-10 or organic options like composted manure).
- ○ Mulch (optional but helpful): Straw or shredded bark (1–2 inches thick).
- ● Rooting hormone (for stressed plants).
- ● Epsom salt (1 tbsp per gallon of water for magnesium boost).
- ● Drip irrigation kit (for post-repotting hydration).
- ● Liquid seaweed extract (1 tsp per gallon of water for stress relief).
Step-by-Step guide for repotting strawberry plants
Here's how to refresh your strawberries' home for stronger roots and juicier berries.
🪴 Step 1: Choose the Right Time and New Containers
Repot strawberries in early spring before new growth begins or in early fall after harvest. Avoid repotting during fruiting—it stresses the plant. Select containers at least 12 inches wide and deep (one per plant) with drainage holes. I use terra cotta pots because they wick away excess moisture, preventing root rot that strawberries hate.
Pick containers 2-3 inches larger than the current root ball. Too much extra space leads to soggy soil and weak growth. If you're repotting multiple plants, use the same container size for even moisture distribution. Check for cracks in old pots—repair with waterproof sealant if needed.
🌱 Step 2: Prepare Fresh Potting Mix and Prune Roots
Fill the new container one-third full with a well-draining potting mix (avoid garden soil—it compacts and suffocates roots). I blend 50% peat moss, 30% perlite, and 20% compost for perfect aeration. Moisten the mix until it's damp but not dripping.
Gently remove the plant from its old container and trim any circling or mushy roots with clean scissors. Focus on the outer roots—healthy ones are white or light tan. If roots are tightly bound, loosen them with your fingers. This encourages outward growth rather than root-bound circles that strangle the plant.
☀️ Step 3: Position and Plant for Optimal Growth
Place the plant in the new container so the crown (where leaves meet roots) sits just above the soil line. Burying the crown causes rot; leaving it exposed dries out the plant. Fill around the roots with fresh mix, pressing lightly to remove air pockets. Leave 1 inch of space at the top for watering.
After planting, water deeply until water runs from the drainage holes. This settles the soil and eliminates air gaps. Place the repotted strawberry in a spot with 6-8 hours of sunlight—partial shade is fine during the hottest summer months. Watch for yellowing leaves in the first week; this is normal as the plant adjusts to its new home.
💧 Step 4: Water and Fertilize for Recovery
Keep the soil evenly moist for the first 2-3 weeks—not soggy, not dry. I water in the early morning so leaves dry quickly, reducing fungal risks. After that, water when the top inch of soil feels dry. Overwatering is the #1 killer of repotted strawberries; they need good drainage but consistent moisture.
Wait 4-6 weeks before fertilizing. Once new growth appears, use a balanced 10-10-10 fertilizer at half strength. Strawberries are light feeders—too much nitrogen makes leaves grow at the expense of fruit. I also add a handful of compost to the surface monthly during growing season for steady nutrients.
⏰ Step 5: Monitor and Adjust for Next Season's Success
Check the roots after 6 weeks by gently tugging on the plant. If it resists, roots have established. If it slides out easily, give it 2 more weeks of care. Remove any old or damaged leaves that develop to redirect energy to root growth and new shoots.
By next spring, your repotted strawberries will show stronger stems, more runners, and bigger berries. The key is patience—repotting stresses plants, but with the right care, they bounce back with vigor. Keep an eye out for white flowers in early spring; that's your sign the roots have fully recovered and it's time to focus on fruit production.
Tips & tricks for revitalizing strawberry roots
These simple strategies will help your strawberries thrive after repotting—and avoid the common pitfalls that sabotage growth.
Container Selection Matters: While terra cotta pots are ideal, plastic containers work too if they have drainage holes. The key is matching container size to the root ball—never more than 2-3 inches larger. I've seen gardeners use old buckets with holes drilled in the bottom, and they work surprisingly well. Just avoid anything wider than 12 inches, or you'll end up with soggy soil and weak plants.
Root Pruning Technique: When trimming roots in Step 2, focus on the outer third of the root ball. Healthy roots should be white or light tan—anything darker or mushy should come off. I use sterilized scissors to make clean cuts, and I never cut into the center of the root mass. This prevents shock and encourages outward growth rather than root-bound circles that strangle the plant.
Crown Position is Critical: In Step 3, the crown must sit just above the soil line—never buried, never exposed. I mark the soil line with a pencil before planting to ensure perfect positioning. After planting, I give the pot a gentle shake to check if the crown stays in place. If it sinks, add a little more mix around the edges. This simple check prevents rot while avoiding drying out.
Watering Wisdom: The first 2-3 weeks are crucial for moisture balance. I set a timer for morning watering to maintain consistent dampness without overwatering. After that, I check the top inch of soil with my finger—if it's dry, it's time to water. Strawberries hate soggy feet but also can't handle drought, so finding that middle ground makes all the difference.
Pro Tips for Repotting Strawberry Plants
- These simple strategies will help your strawberries thrive after repotting—and avoid the common pitfalls that sabotag...
- Container Selection Matters: While terra cotta pots are ideal, plastic containers work too if they have drainage hole...
- Root Pruning Technique: When trimming roots in Step 2, focus on the outer third of the root ball. Healthy roots shoul...
Frequently asked questions
Got questions about repotting strawberries? You’re not alone! Here are answers to the most common concerns—so you can confidently give your plants a fresh start.
When is the best time to repot strawberry plants?
Repot strawberries in early spring (before new growth starts) or late summer (after harvest). Avoid repotting during extreme heat or cold—roots need time to adjust. If repotting in summer, water deeply afterward to reduce stress.
How often should I repot strawberries?
Strawberries need repotting every 2–3 years or when roots crowd the pot (check by gently removing the plant). Overcrowding leads to smaller berries and pests. If using containers, opt for larger pots (5+ gallons) to delay repotting longer.
What if my strawberries stop fruiting after repotting?
Don’t panic! Reduced fruiting is normal for 2–4 weeks as roots adjust. Ensure the new pot has well-draining soil and place it in partial sun. Overwatering or shock can delay recovery—keep soil moist but not soggy.
Can I repot strawberries into the ground instead of pots?
If moving to garden beds, choose a sunny, well-drained spot with rich soil. Space plants 18–24 inches apart. Add compost to the soil for nutrients, and mulch to retain moisture. Just avoid repotting during frost or drought.
Why are my strawberry leaves turning yellow after repotting?
Yellow leaves often signal root shock or overwatering. Trim any mushy roots, reduce watering slightly, and fertilize lightly with a balanced formula (10-10-10). If yellowing persists, check for pests (like spider mites) or nutrient deficiencies (like nitrogen).
Wrapping up and next steps
Repotting your strawberry plants is a simple yet powerful way to boost their health and productivity for seasons to come! 🌱 By refreshing their growing space, you’re giving them room to thrive, stronger roots, and a head start on next year’s juicy, sweet harvests.
Don’t let hesitation hold you back—your strawberries (and your taste buds!) will thank you.
Ready to take the next step? Mark your calendar for late summer or early fall—the perfect time to repot—and enjoy watching your plants flourish. Happy gardening! 🌟