
Container Gardens
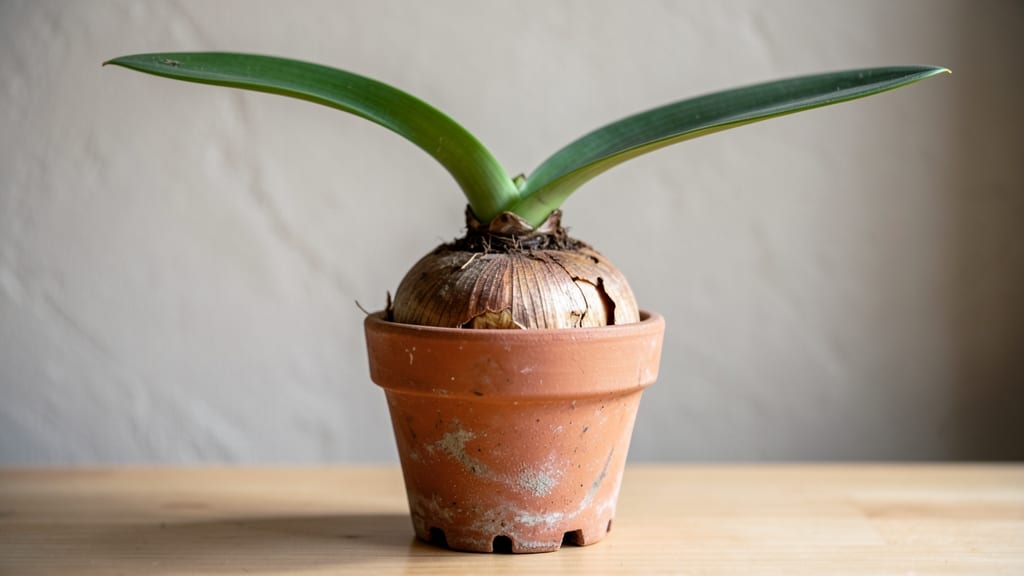
Growing potted amaryllis bulbs gives you 6-foot-tall blooms indoors when nothing else is flowering. 🌸 I’ve turned my living room into a winter garden showstopper by following three simple rules: the right bulb, the right pot, and the right timing.
Most people overlook the soil mix or light needs—and that’s what keeps their amaryllis from blooming reliably.
The secret starts with a well-draining potting mix (never garden soil) and a container with drainage holes—just like the ones you’d find at garden centers. You’ll need a bulb that’s firm, heavy for its size, and free of soft spots.
Plant it halfway into a pot that’s only 1-2 inches wider than the bulb itself, leaving the top third exposed. Water lightly after planting, then wait for the first sprouts to appear.
Within 6 weeks, you’ll see those dramatic, trumpet-shaped flowers shooting up, and with just 10 minutes of care a week, they’ll keep blooming for months. The key is keeping the soil barely moist (not soggy) and placing them in bright, indirect light—no direct sun needed.
Even my black thumb can’t kill these with this method.
Once the blooms fade, don’t toss the pot! Let the leaves yellow naturally, then reduce watering until they go dormant. Store the pot in a cool, dark place for 8-10 weeks before bringing it back into bloom next season.
It’s the only houseplant that gives you this much drama with so little effort.
📚 In This Guide
- What you need
- Instructions
- Tips and common mistakes
- Wrapping up and next steps
What you need
- ● 1–2 healthy amaryllis bulbs (choose large, firm bulbs, 6–8 inches in diameter for best results).
- ● 1 container per bulb (6–8 inches deep and wide, with drainage holes). Terracotta or ceramic pots work best!
- ● Potting mix (3–4 cups per pot): Use a well-draining blend like cactus/succulent mix or amend regular potting soil with 20% perlite or coarse sand.
- ○ Drainage material (optional but recommended): 1–2 inches of pebbles, gravel, or broken pottery at the pot’s base.
- ● Gloves (to protect hands from sharp bulb edges).
- ● Watering can or spray bottle (with a gentle spray nozzle for hydration).
- ○ Fertilizer (optional): A balanced liquid fertilizer (10-10-10) or bulb-specific food (follow label instructions).
- ● Bright, indirect light (a sunny windowsill or grow light works).
- ● Patience & enthusiasm! (Amaryllis blooms in just 6–8 weeks—no waiting forever!).
- ● 🔥 Skip the soil test: Amaryllis bulbs thrive in slightly dry conditions—overwatering is their #1 enemy!
- ● ✨ Repurpose containers: Old boots, teapots, or even a clean plastic bucket with holes can work!
- ● 🌡️ Temperature control: Keep bulbs in 65–75°F during growth (no drafts or AC vents!).
Step-by-step instructions for potted amaryllis bulbs
Here's how I get vibrant blooms every year—no fuss, just stunning results.
🪴 Step 1: Select and Prepare the Right Pot
Choose a container that's just slightly larger than your bulb—about 2-3 inches wider and deeper than the bulb itself. I like pots with drainage holes because amaryllis bulbs rot easily when soggy. If your pot lacks holes, add a layer of pebbles at the bottom for drainage.
Fill the bottom 1 inch with well-draining potting mix—this prevents water from pooling around the bulb. Tap the pot gently to settle the soil, but don't pack it down too tightly. The mix should feel light and airy, like crumbled cookie dough.
🌱 Step 2: Plant the Bulb Correctly
Place the bulb in the pot so that half of it sits above the soil line. This ensures the top remains exposed to light, which is crucial for blooming. I press the bulb gently into the mix until it stands upright—no need to force it.
Cover the bulb with 2-3 inches of potting mix, leaving the top half exposed. Don't worry if it looks uneven; amaryllis bulbs don't need perfect soil coverage. Water lightly until the soil feels moist but not saturated.
☀️ Step 3: Provide Light and Water Consistently
Set your potted amaryllis in a spot with bright, indirect light—like an east or west-facing window. Direct sunlight can scorch the leaves, while too little light delays blooming. You'll know it's getting enough light when the leaves stay deep green and firm.
Water the bulb only when the top inch of soil feels dry. Overwatering is the fastest way to kill an amaryllis, so I always check with my finger before adding more water. After watering, let excess moisture drain completely—never let the pot sit in saucers of water.
⏰ Step 4: Encourage Blooming in 6 Weeks
After the first 6-8 weeks, when the leaves reach about 6-8 inches tall, start fertilizing with a balanced liquid fertilizer diluted to half strength. I feed mine every 2 weeks to give it a gentle nutrient boost without overwhelming the roots.
Watch for a flower stalk to emerge from the center of the bulb—this is your signal that blooming is underway! Keep the pot in the same bright spot and avoid moving it, as sudden changes can cause buds to drop.
✂️ Step 5: Care for Blooms and Prepare for Next Year
Once the blooms open, enjoy them for 7-10 days, then trim the spent flower stalk at the base. Don't cut the leaves—they feed the bulb for next year's blooms. I place my potted amaryllis in a slightly cooler spot (55-65°F) after blooming to mimic its natural dormancy cycle.
Reduce watering to once every 2-3 weeks until the leaves turn yellow and die back. At this point, you can either store the bulb in a dry, dark place or keep it in the pot with minimal water. In late summer, bring it back into light and resume regular care for another round of blooms.
Tips & tricks for potted amaryllis care
Common mistakes can turn your amaryllis into a sad, wilted mess—here's how to avoid them while keeping things simple.
Pot Selection: Never use a pot that's too big—amaryllis bulbs rot when their roots sit in soggy soil. If you don't have drainage holes, add a 1-inch layer of pebbles at the bottom before the potting mix. I've learned this the hard way after losing two bulbs to root rot! The pot should only be 2-3 inches wider than the bulb itself to prevent moisture buildup.
Light Exposure: Bright, indirect light is key—direct sun can scorch those beautiful leaves while too little light delays blooming. I place mine near an east-facing window where it gets morning sun and gentle afternoon light. Rotate the pot every few weeks so all sides get even exposure, preventing lopsided growth.
Watering Wisdom: The finger test is your best friend! Stick your finger about 1 inch into the soil—if it feels dry, water lightly until moisture reaches that depth. Overwatering is the #1 killer of amaryllis, so I always let excess water drain completely through the bottom. If your pot lacks drainage, water only when the top 2 inches feel completely dry.
Bloom Encouragement: Those 6-8 weeks before blooming are critical—don't rush it! Once you see a flower stalk emerge, keep the pot perfectly still and avoid moving it. Sudden changes can cause buds to drop. I've found that placing the pot on a stable surface (not a drafty area) helps maintain consistent conditions for successful blooming.
Pro Tips for Potted Amaryllis Bulbs
- Common mistakes can turn your amaryllis into a sad, wilted mess—here's how to avoid them while keeping things simple.
- Pot Selection: Never use a pot that's too big—amaryllis bulbs rot when their roots sit in soggy soil. If you don't ha...
- Light Exposure: Bright, indirect light is key—direct sun can scorch those beautiful leaves while too little light del...
Frequently asked questions
Got questions about growing potted amaryllis bulbs? You’re not alone! Here are answers to the most common queries—because even bold blooms need a little guidance.
How long does it take for amaryllis bulbs to bloom after planting?
With proper care, your amaryllis will reward you with stunning blooms in just 6–8 weeks! The key is patience—keep the bulb in a warm, bright spot (but out of direct sunlight) until you spot a spiky shoot. Once that happens, move it to a sunny window or grow light to speed up flowering. Pro tip: Chill the bulb for 6–8 weeks before planting to mimic winter dormancy and trigger blooms faster!
Can I plant amaryllis bulbs in water instead of soil?
Some gardeners swear by the water method for a low-maintenance approach. Simply place the bulb in a shallow container with just enough water to cover the bottom third. Change the water weekly and watch roots sprout in about 2 weeks. But here’s the catch: Once the stem reaches 6 inches, transfer it to soil to support the heavy blooms. Water-only bulbs may struggle to hold up their flowers long-term.
Why isn’t my amaryllis bulb flowering this year?
No blooms? Don’t panic—amaryllis bulbs often need a rest period to rebloom. Common culprits include:
- Lack of dormancy: Skip the 6–8 week chill (40–50°F) after flowering.
- Overwatering: Soggy soil = rot. Let the top inch dry out between waterings.
- Not enough light: Amaryllis crave bright, indirect light (south-facing window or grow light).
- Small bulb size: Bulbs under 6 inches may need a year to mature.
How do I revive a mushy or rotting amaryllis bulb?
If your bulb feels soft or smells funky, it’s likely rotten from overwatering. Act fast:
- Remove the bulb from the pot and trim away any mushy, blackened areas with a sterilized knife.
- Dust the cuts with cinnamon or fungicide to prevent further rot.
- Repot in fresh, well-draining soil (add perlite or sand) and hold off on watering for 1–2 weeks.
- Place in bright, indirect light and water only when the top 2 inches of soil are dry.
Can I force amaryllis bulbs to bloom out of season?
Yes! Amaryllis are perfect for holiday gifting because you can trick them into blooming anytime. Here’s how:
- Buy bulbs labeled “pre-chilled” or chill your own for 6–8 weeks in a cool, dark place (like a fridge).
- Plant in well-draining soil and place in a warm (70–75°F), bright spot.
- Water lightly until sprouts appear, then increase water as growth speeds up.
Wrapping up and next steps
Growing potted amaryllis bulbs is a rewarding way to bring vibrant, eye-catching blooms into your home with minimal fuss! 🌸 With just a little patience and the right care, you’ll enjoy stunning flowers in as little as 6 weeks.
Whether you’re a seasoned gardener or a beginner, these bold beauties are perfect for adding a pop of color year-round.
Now that you’re armed with the know-how, pick your favorite bulbs and get planting! Share your progress with fellow plant lovers—your amaryllis journey is about to bloom into something magical. 🌱✨